This is a general LCD replacement tutorial made by LaptopScreen.com. Not your specific model? Click here to search our video library for a model specific guide.
This is a step-by-step guide on how to replace an LCD screen on an IBM ThinkPad T60. Please watch the video or follow these steps below:


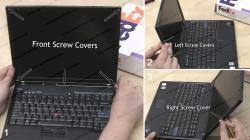
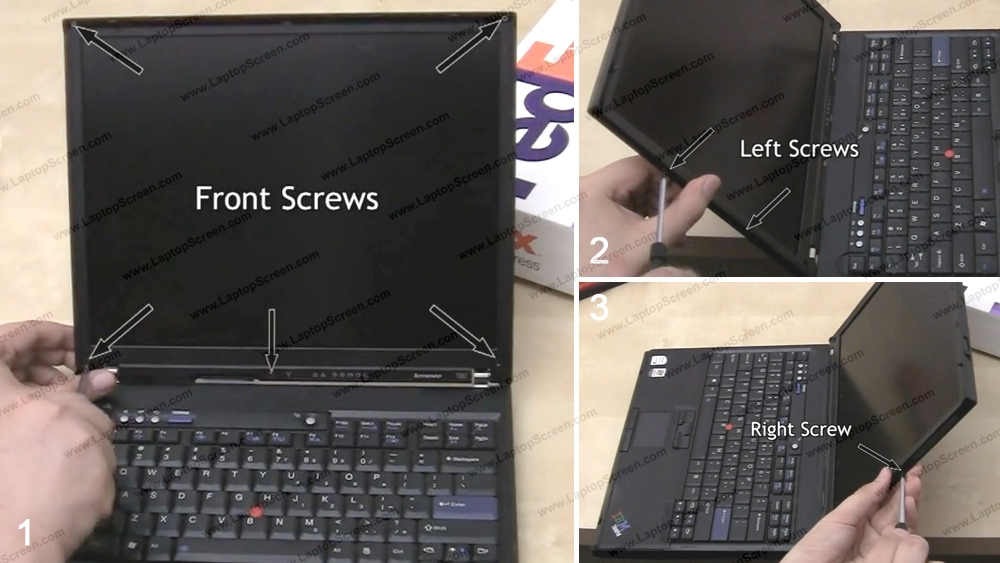
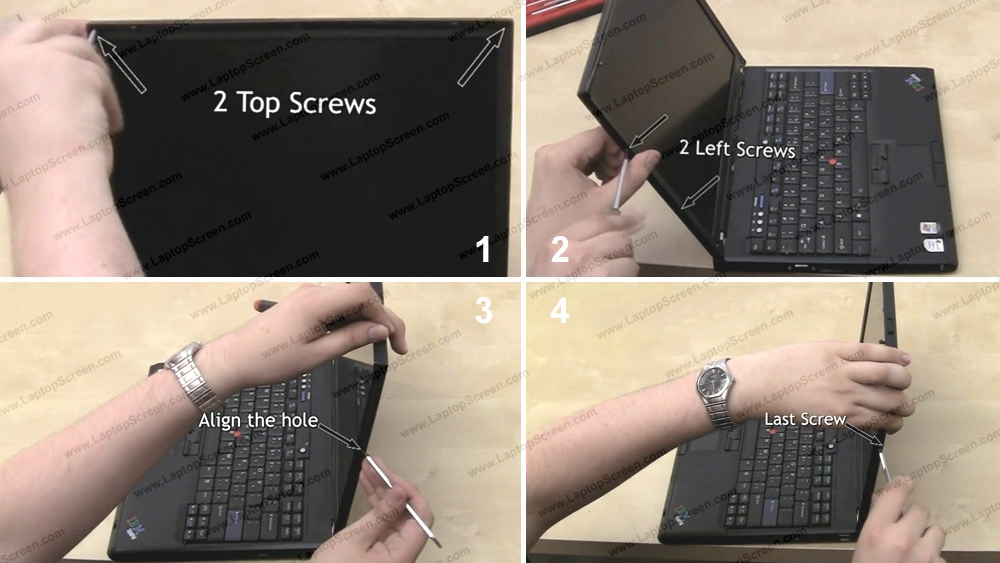
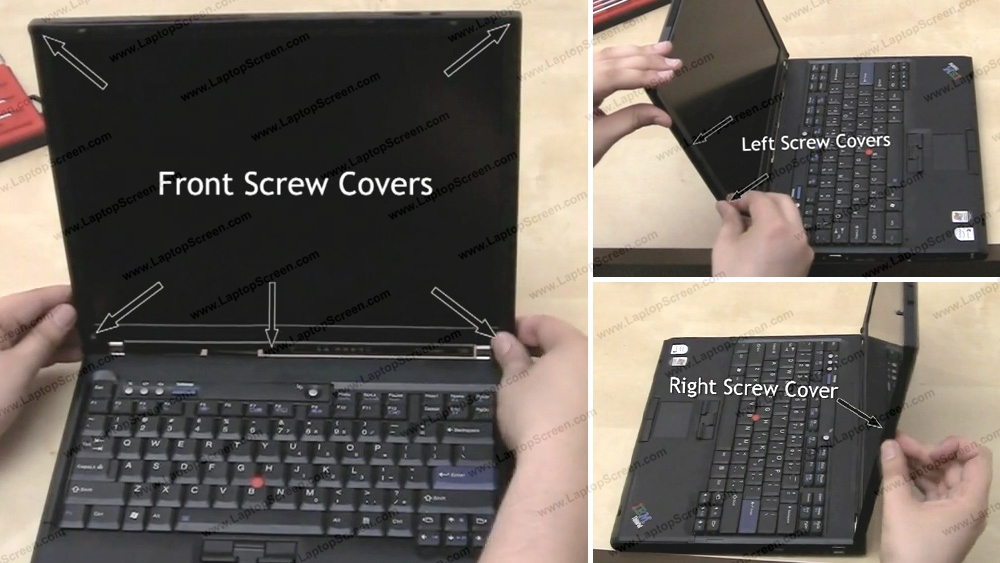
3 Start by removing 5 rubber screw covers on the front side, then 2 on the left side and one more one the right side.

4 Proceed with removing all 8 screws located under the screw covers. Note that the 3 bottom screws are larger than the rest.

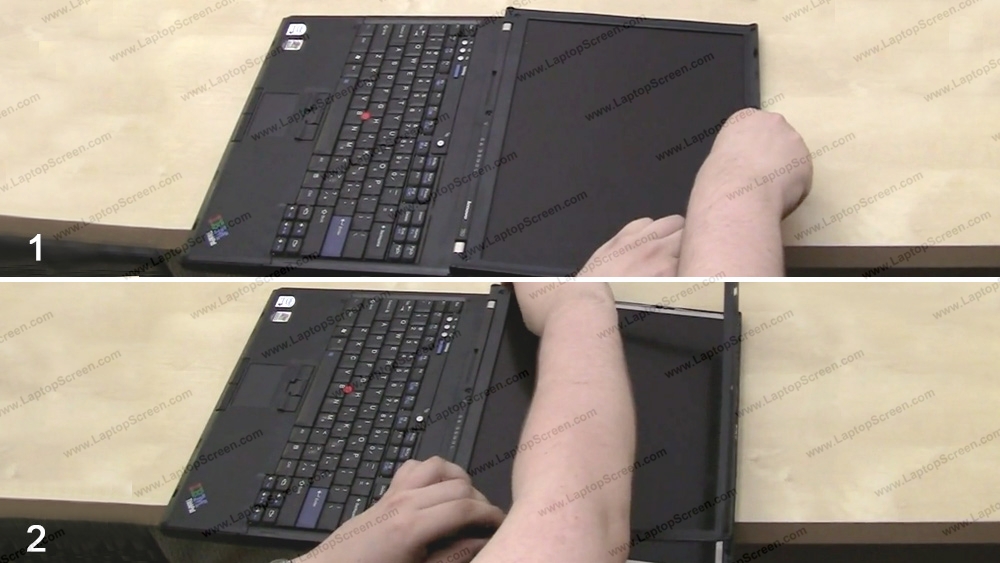
5 Now you can remove the bezel. Start on the top and move along the perimeter towards the bottom prying the plastic away from the screen. Set the bezel aside.


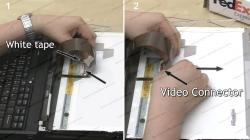
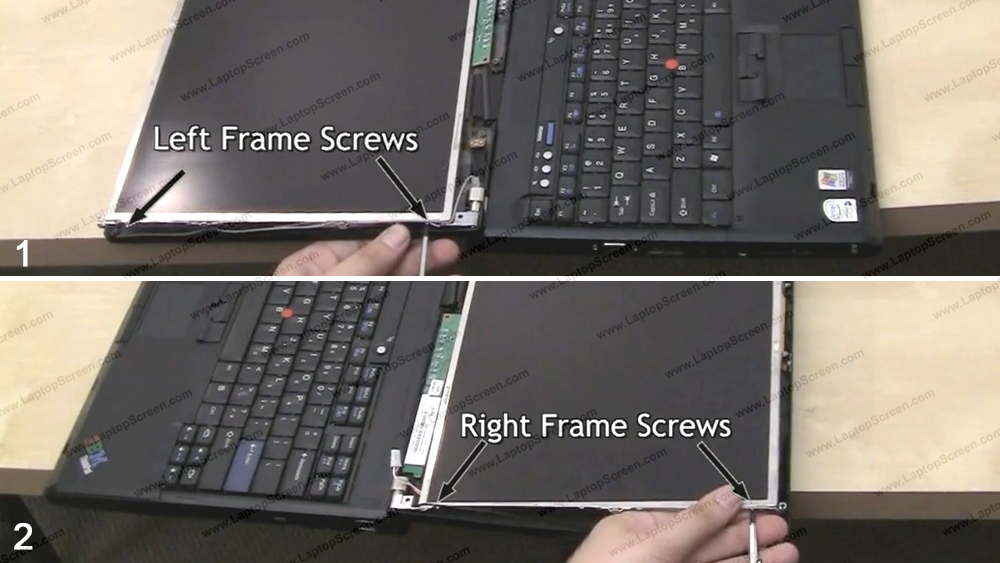
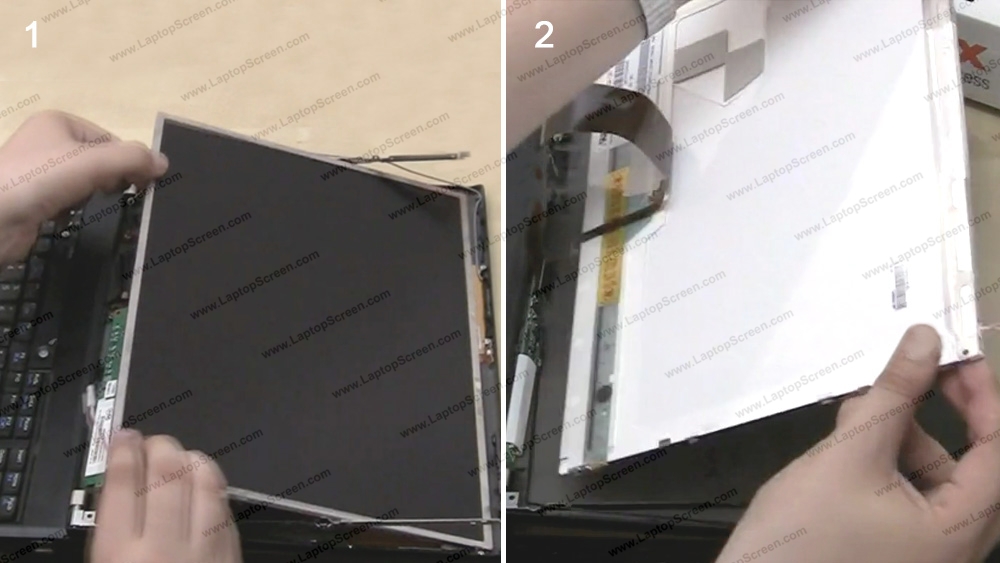
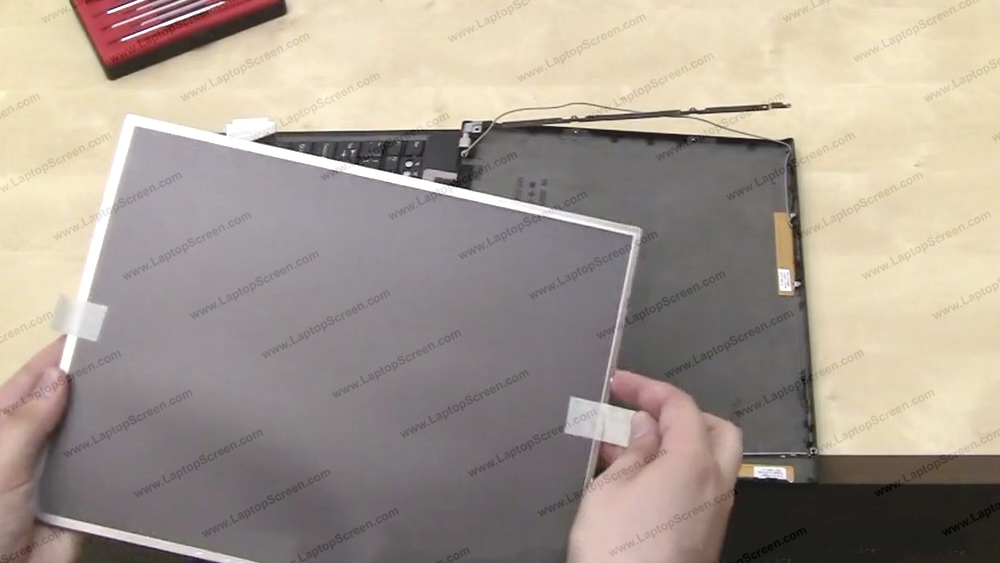
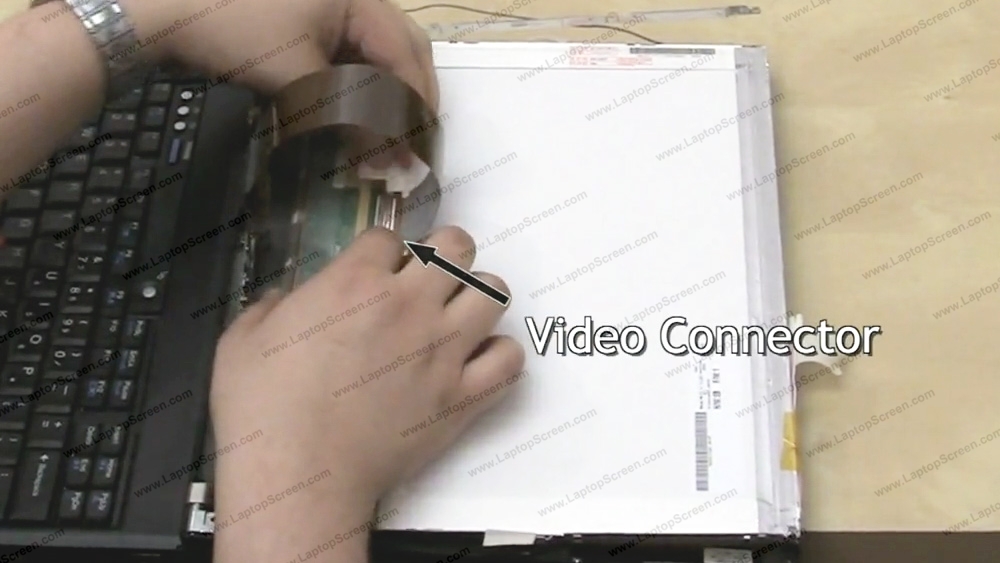
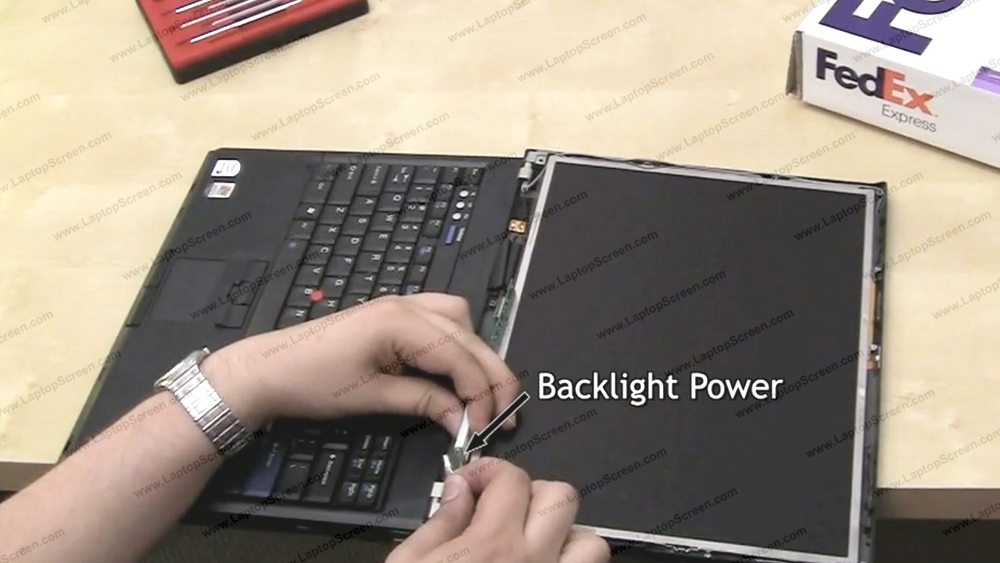
10 Peel off white tape securing the video connector and disconnect the video cable. Discard the old LCD.

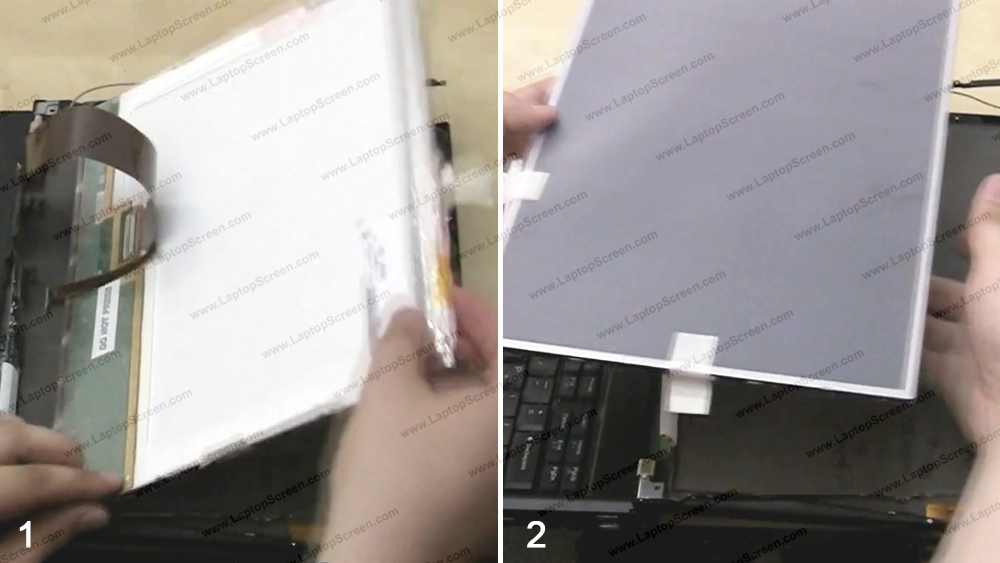
11 Take out the new screen. Bend out the protective film tabs on the back of it.
Place a cloth or a paper towel on the keyboard to protect the screen from scratching. Put the new LCD on the keyboard.
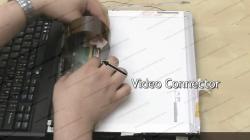
12 Reconnect the video cable and secure it with the white tape. Be very gentle while reconnecting cables since all the connectors are extremely fragile.


19 Replace the bezel. Align it with the screen frame and snap around the perimeter starting at the top and moving to the sides. Leave the bottom edge unsnapped.
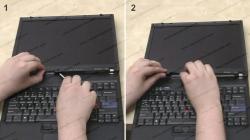
20 Before snapping the bottom edge of the bezel we need to align the cable guide. Use a screwdriver to adjust and put the cable guide in place. Snap the rest of the bezel.


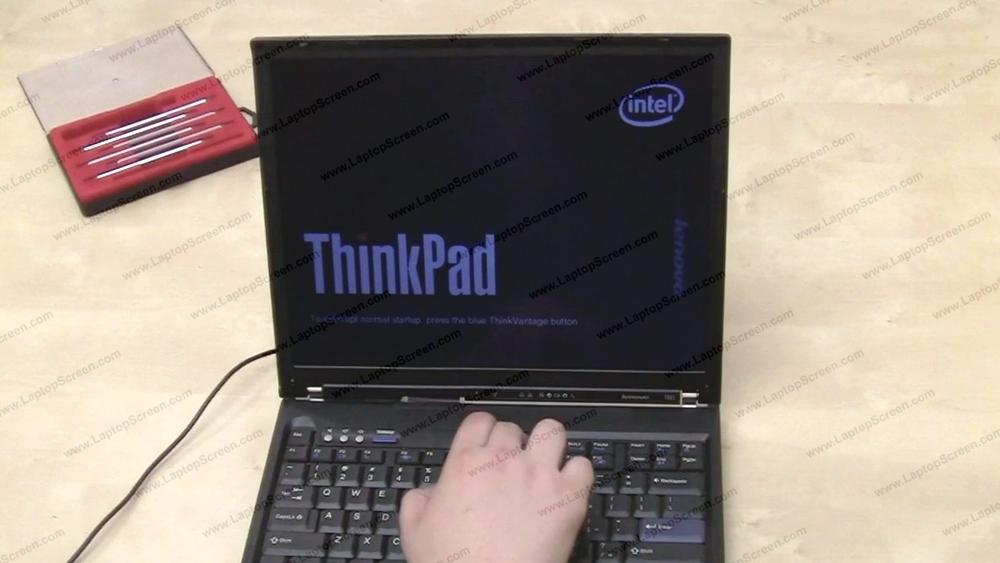
22 Now you can test your new screen. Connect the power adapter and press the start button. Once the boot up graphics appear - the screen is installed correctly. Press and hold the power button to cancel the boot up, then disconnect the power adapter in order to finish the installation.

